
Recent Blog Posts
- The People's Jamboree: Strikes Back
- The People's Jamboree: Strikes Back
- The People's Jamboree: Strikes Back
- The People's Jamboree: Strikes Back
- The People's Jamboree: Strikes Back
- The People's Jamboree: Strikes Back
- The Cremorne, Sheffield 26th October 2012
- The Bedford Incident @ The Cremorne, Sheffield 26th October 2012
- The Bedford Incident @ The Cremorne, Sheffield 26th October 2012
- The Bedford Incident @ The Cremorne, Sheffield 26th October 2012
Recent Comments
Greg's Photos on Flickr

What I'm Listening To...
Tags
How To
HOW TO: Watch Sopcast through Orb on your iPhone or iPod Touch
Sat, 08/11/2008 - 15:45 — gregThis is just a quick tutorial about setting up sopcast to work over orb. Once you have done that you will be able to set up your iPhone to watch sopcast on the go!
Things you will need:
An iPhone or iPod Touch running firmware 2.0 or higher.
A PC running Orb
The Orblive app for the iPhone/iTouch.
Setting Up the PC side:
Install sopcast on your PC.
You will then need to set up orb on your PC. Orb is a fantastic application that allows you to stream your media from your home PC to any other PC on the internet including live TV! I wont go into the details of how to set orb up here you can find all that on orb's website. You basically sign up for an account, and download the orb server to your PC.
Once you have both sopcast and orb set up on your PC you need to add sopcast's local stream address to orb.
Go to your orb account on the web at http://mycast.orb.com log in with your orb ID and password and go to settings in the top right hand corner.
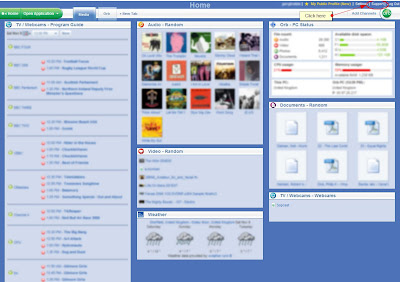
Then from the settings menu click on the dropdown box in the top left corner:
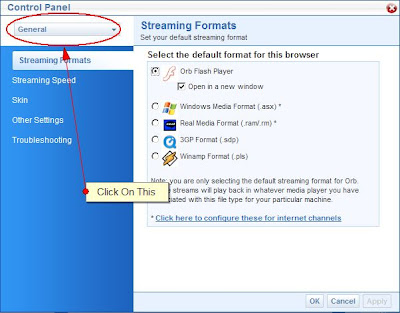
Select "TV/Webcams" then "Devices"
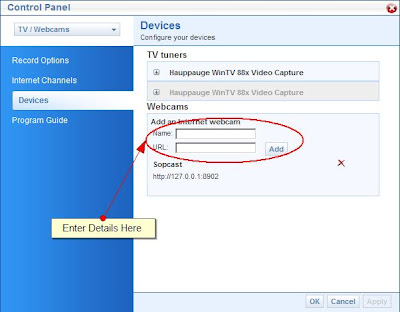
Now where it says "add an internet webcam" put
Name: Sopcast
URL: http://127.0.0.1:8902
***UPDATE 28/7/10***
Apparently you now have to use:
Name: Sopcast
URL: http://127.0.0.1:8902/stream
And then click "add"
Launch sopcast on your PC and choose a channel.
Your PC is now set up to stream sopcast to orb and thus any PC on the internet. The hard bit is now done. You just need to set up your iPhone/iTouch to access it.
Setting up the iPhone:
Grab the orblive app from the appstore. Once you have downloaded and installed it run it.

Enter your orb ID and password in the settings section. The app will then log you into orb. Then
if you then tap on the "webcams" section.

You should see an icon named "sopcast".
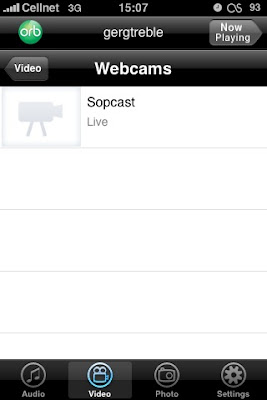
Now click on the sopcast icon, within a few seconds you should be watching sopcast.

Right now the orblive app only works over wifi. There is a way around this if you have a jailbroken iphone. But that is another how to...
There is a new version of orblive in the appstore which allows you to stream media over 3G and EDGE. Finally you can watch TV at the bus stop!
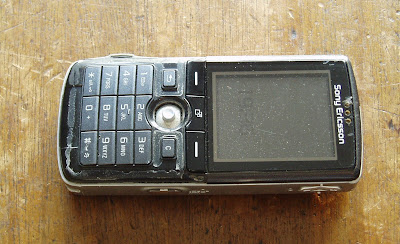
HOW TO: Dismantle a Sony Ericsson k750i and fit a new casing
Fri, 04/05/2007 - 05:06 — gregYou may have read my post about upgrading the firmware on my well used old k750i. Well that got me thinking. What else could I do to give it a new lease of life. As you can see the casing was pretty beat up. And the camera lens cover was completely missing!
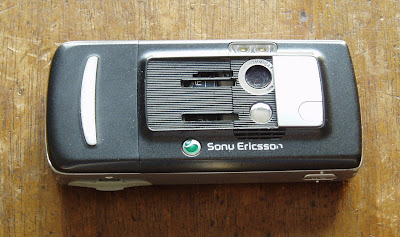
So what could i do? I hit ebay and found you could buy replacement casings for less then £10. So I ordered a nice shiny red one and waited for it to be delivered. And waited, and waited, and waited. Eventually 3 weeks later it arrived. The perils of buying from China I suppose. Anyway it looked excellent, as you can see:
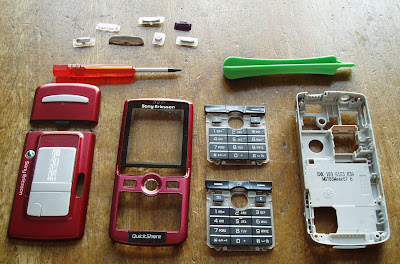
It came with a size 6 torx screwdriver and a case opener. Just the tools needed to dismantle the phone.
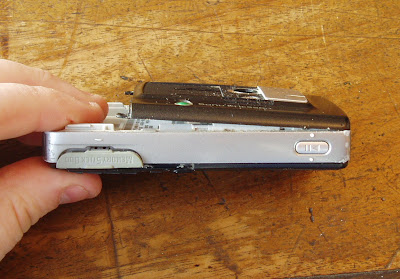
The next step was to strip down the k750i into its component pieces. Its surprisingly not difficult. First I had to use the torx driver to remove the 2 screws in the battery compartment. And the two tiny phillips head screws that held the back fascia down.

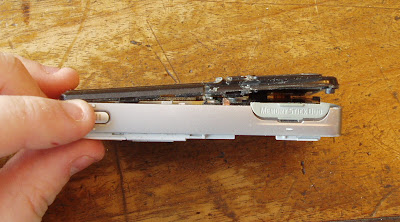
Then using the case opener I was able to pry the rear fascia away from the main housing. The trick was to start at the battery compartment end and work down each side to the top.

Once the back fascia was removed, I had a better view of what was inside.
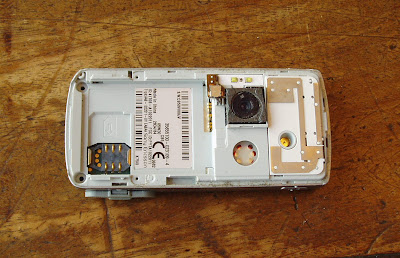
The same process could then be repeated on the front fascia, gently prying off the casing being careful not to use too much force near the LCD display.
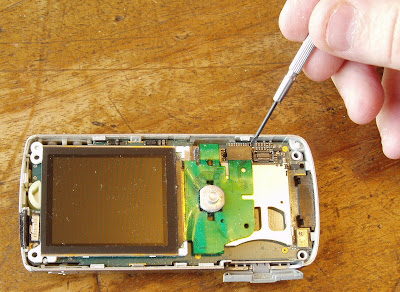
Now the guts of the beast are on display! Along with two more torx screws which need to be removed before we go any further.
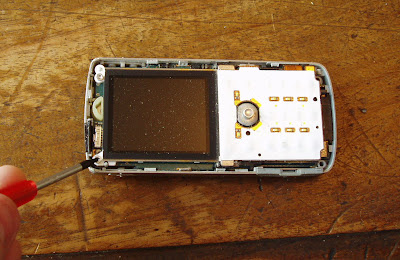
Now the time has come to remove the keyboard unit. It actually comes off rather easily with only a little force. But if you are feeling scared you can prise the socket apart with a small screwdriver. You can see that most of the major parts simply click together using a plug and socket technique. This makes it VERY easy to dismantle and rebuild.
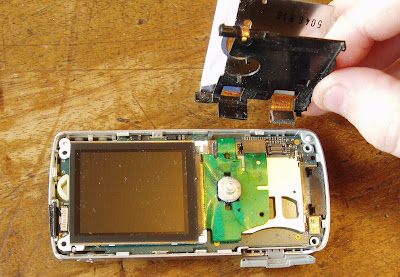
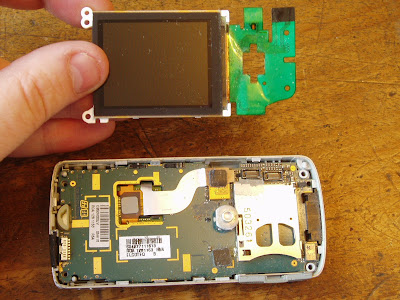
The LCD can now be disconnected from the main board in the same fashion.
Be careful with the LCD as it is by far the most fragile part of the phone. Its also worth giving each part a thorough clean before rebuilding, my phone was FULL of finger grime after years of use under several different members of my family.
The camera unit can now be disconnected from the main board.
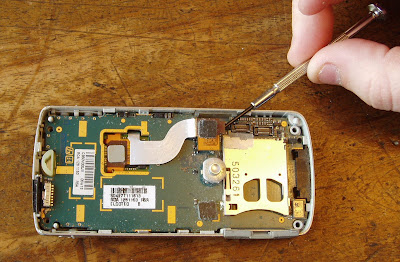
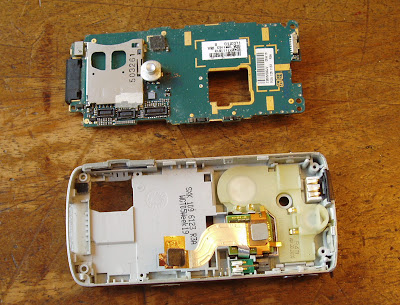
Now we remove the main board. Its held in by a couple of clips on the main housing. Simply push these back with either a small screwdriver or the opening tool.
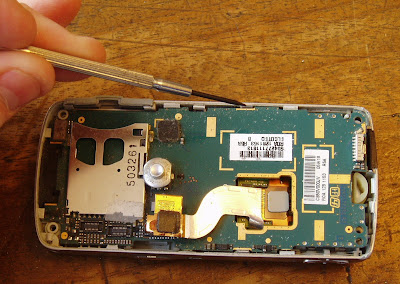
The main board removed from the body, showing the main camera unit and the speaker unit.
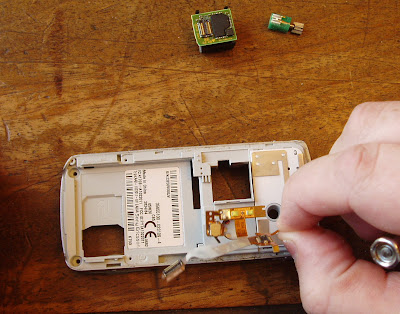
Now this is where it gets kind of tricky. You can pop the connection ribbon off the top of the camera.
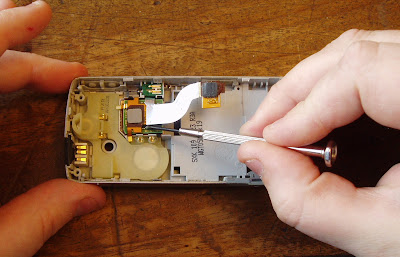
Like so:
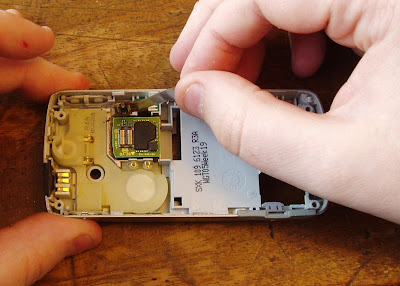
The camera unit just slides out, and is surprisingly compact. Next step is to gently pry out the vibration motor.
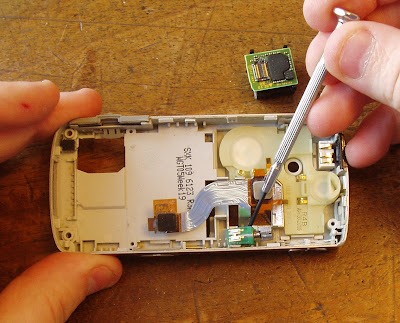
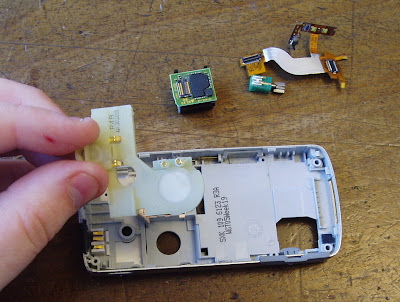
Then flip the entire unit over and GENTLY peel the camera connection ribbon and switch off the back of the housing. It is actually stuck down with glue but peels off easily once you have got a corner up.
Now we turn attention to the speaker unit. Now it the beat time to go through the main housing ant take out all the buttons. There is a very small connector by the camera shutter release button that you must not overlook. Once you have all the buttons out you can start to worry about how you are going to pry up the speaker unit. I actually went in though the button hole for the play/pause button. It allowed me to get my little screwdriver underneath it and pry it up. It could then be removed with little fuss.
The final part to be removed is the backplate/IR transmitter unit. This just needs prying up from the rear side.
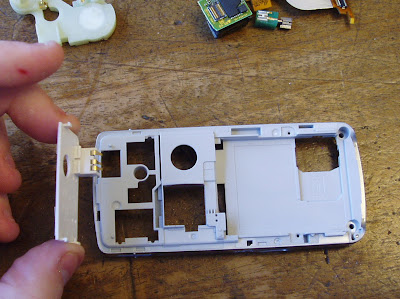
Thats It! Everything is now apart. You can now rebuild the phone using the new casing and buttons. I ended up using some of the old buttons though in places as the newer ones seemed to be slightly larger and where rather stiff. Here are some shots of the finished phone.

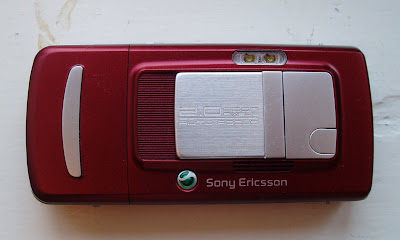
Not bad eh! Looks like a completely new phone. I'm very happy.
Larger versions of the photos in this post can be found in the relevant web gallery.
HOW TO: Upgrade the Firmware of a Sony Ericsson k750i to that of a w800i walkman phone
Fri, 20/04/2007 - 06:50 — gregI recently got hold of a beaten up, but working Sony Ericsson k750i phone. I'm planning a couple of mods for it, new case and maybe an LED colour change. However the first thing I did was hack the phone so I could upgrade its firmware to that of the w800i, basicaly changing the phone into a one with Walkman capabilities. The two phones are identical in makeup but come with different firmwares installed. Anyway I found this method on a forum somewhere, apologies to whoever I copied and pasted it from. I cleared up the spelling and grammar and present it for you here.
What you need:
-The exploit (found here http://www.megaupload.com/?d=MP5ZL5TQ)
-SEUS the sony erricson firmware upgrader (download at www.sonyericsson.com/support)
-W800.exe (Found in the Exploit)
-The CDA you want to use ( http://www.se-world.info/cda-strings )
-flash-driver (same as when you use SEUS for first time, see tutorial )
- 'cygwin1.dll' , you will find this in the exploit files.
What to do:
-copy cygwin1.dll to your windows\system32 folder
-EXTRACT CONTENTS TO A FOLDER NAMED W800
-the phone has to be cid36
Now step by step:
-Turn phone OFF and remove battery, sim card and USB cable.
-Replace battery (Do Not Turn Phone ON)
-after unzipping Double-click "W800.exe"
-Connect USB once you see the "30 seconds" message.
-A pile of data should scroll down the screen.
-On the blank line below the last bit of text type cda102430/6*, then hit Enter. *Note: here has to be your CDA you need. Take a look at the CDA string list for the one that you want.
-Now Type Q in the blank line below the last piece of text, then hit Enter.
-It should now tell you to remove the USB, after this you'll recieve a connection error. This is normal. close the program.
Now follow the SEUS-tutorial, your phone should be detected as W800.
Complete the update via SEUS, that's all.
NOTE: you do this at your OWN RISK!!!!
HOW TO: Use RSS and uTorrent to automaticaly download TV shows.
Fri, 13/04/2007 - 00:12 — gregFirst download uTorrent, in my opinion the best torrent client out there. Its compact, has a low memory footprint and most importantly has a built in RSS reader.
So once you have uTorrent installed open it and select the RSS button.

Then press the "add" button and add this url: http://tvrss.net/feed/combined/
Like so:

Now you need to tell the reader which torrents you want to download. For example Heroes torrents. So click on the favorites tab and In the filter section write in the name of the TV show. You can use * as a wild-card. You can also tell uTorrent where to save it and what quality torrent (SD HDTV HR.HDTV etc), as well as what episode numbers you want. Its also good to set a minimum interval of say 4 days so you don't download any duplicates of the same show. It should look like this:

Once every thing is filled in and you are satisfied, click close. And your uTorrent is now armed to download whatever show you have specified from the RSS feed.